From The Garden: Chive Pesto

A Hero plant: chives

I’ve written before about some of my hero plants in our raised bed potager garden, chives would be at the top of that list. We currently have 8 mature plants in 4 different beds, which were originally 4 plants that have been split as they’ve matured and expanded. They thrive in our conditions here and are the first sign of green to pop through the soil in Spring, and the last plant we’re still cutting from in the Fall. They’re completely low maintenance - we cut them right down about 3 times per season, and they quickly grow right back. I love the plants radial shape and how much fullness they add to our beds but especially love the burst of purple blooms so early in the season. The only issue is, they produce such an abundance of chives that its more than we can possibly consume ourselves, they don’t last long once picked and it’s too much of a chore even to give them away (I’ve tried). This year I vowed to find a way to make better use of them and after seeing recipes for garlic scape pesto I was instantly inspired to try the same method with chives. We love basil pesto and use it often so I imagined we could use a chive pesto in all the same ways. Since we have zero success growing basil here due to cold and wet conditions, I was hoping this could satisfy my basil pesto craving.

There are loads of chive pesto recipes online, each different in some way, so based on the various methods and ingredients other recipes used, I created my own version. Well it turned out so incredibly GOOD, from the first batch and every batch after that I’m excited to share it for anyone else that’s growing chives. Its better than any store-bought pesto I’ve tasted.

Since we have a continuous supply of chives at the ready I’ve been making continuous batches of this pesto all summer. Its so fresh and so flavourful, its addictive - we’ve been using it on everything. It’s better than any store-bought pesto I’ve ever tasted. Delicious as a condiment or baste on grilled fish, chicken or pork,,,, tossed with pasta, on homemade pizza, on eggs, on sandwiches, for bruschetta and with cheese and crackers. Here’s the recipe:

CAROL’S GARDEN CHIVE PESTO

ingredieNTS

2 Cups - Finely Chopped Fresh Chives

3/4 to 1 Cup - Extra Virgin Olive Oil

1/2 Cup - Fine Grated Parmesan Cheese

1/4 Cup - Sliced Almonds

Juice of 1/2 a Lemon

1 Small Garlic Clove - minced

method

  • add 1/2 Cup of the olive oil to a blender

  • add in the chives and blend on high until combined

  • add in the nuts and blend on high until combined

  • add in garlic, parmasean, lemon juice and blend on high, gradually adding in remaining olive oil plus more until desired consistency

Notes: You can make the texture of pesto as chunky or smooth as you like depending how long you blend it. Use as much oil as you like, I find the consistency of 3/4 C of oil is just right for bottling to use as a condiment or baste on meats etc, but for other uses you might want more oil,, just add as needed per use. I used a blender but you could use a mixer or food processor, you don’t have to finely chop the chives or garlic in that case. You can substitute the almonds for walnuts or pecans but I like that the almonds are mild in flavour so they don’t overpower the chives.

This recipe makes enough for a 270 - 300g jar.

After harvesting the chives, separate/remove the thick flower stems from the bunch, set aside some of the buds for garnish, rinse, pat dry the chives, then cut off any brown tips or white ends.

Finely chop the chives if your using a blender, otherwise if using a food processor just loosely chop. Once finished mixing all the ingredients scoop into jars and garnish with a flower bud.

I added tags to these bottles and gifted them to friends. Some other batches I spooned into plastic lined ice cube trays instead of jars and froze them into cubes before turning them out into a zip lock bag to store in the freezer. (Line ice cube trays with plastic wrap first to prevent your tray from taking on the taste of the chives.)

One of my favourite creations was a pesto goat cheese ball where I coated a ball of goats cheese with chive pesto, drizzled it with olive oil and garnished with chive flowers, served with crackers. It was devoured before I even thought to take a photo - next time! Our most common use for the pesto is to toss it with hot pasta then add in some goats cheese just before plating, and a squeeze of lemon. So fast, so simple and absolutely chef’s kiss delicious.

I’m not great at remembering to take photos of food before serving it but I’ll keep it mind next next time I make a dish with the pesto so I can update this post.

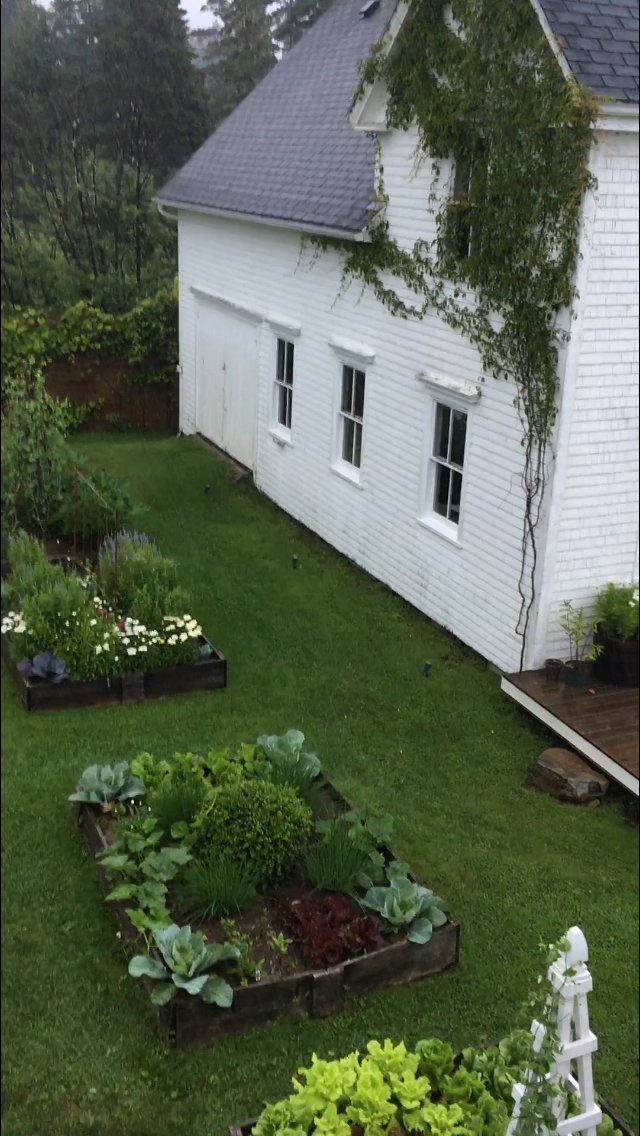
Our garden beds from 2 weeks ago, in the never ending July rain. A raised bed with a boxwood and 4 chive plants flanking it, this was the 2nd growth of these plants after being cut right down at the end of June.

We’ve got months of fresh chives still ahead of us, and now the pickling cukes, snap peas, and zucchini are exploding, its just the best time of year when we can eat something from the garden every day. Beyond that Its challenging to keep up with getting things jarred, canned or preserved if your not eating it all fresh - ours is a relatively small garden so I can totally understand why people set up roadside stands.

If you grow chives, I hope you enjoy trying this recipe or creating a version of your own.

Kitchen: Project Northwest Cove

The Kitchen design

Designing a new kitchen was the priority for the Northwest Cove renovation (introduced in previous post) and although it would be a gentle renovation in terms of construction work the goal was to redesign the space with all new cabinetry, counters and appliances while maintaining the footprint of the room including window and door locations and existing flooring. The new cabinetry and appliances would bring a more contemporary aesthetic and significantly improve the function and storage capacity.

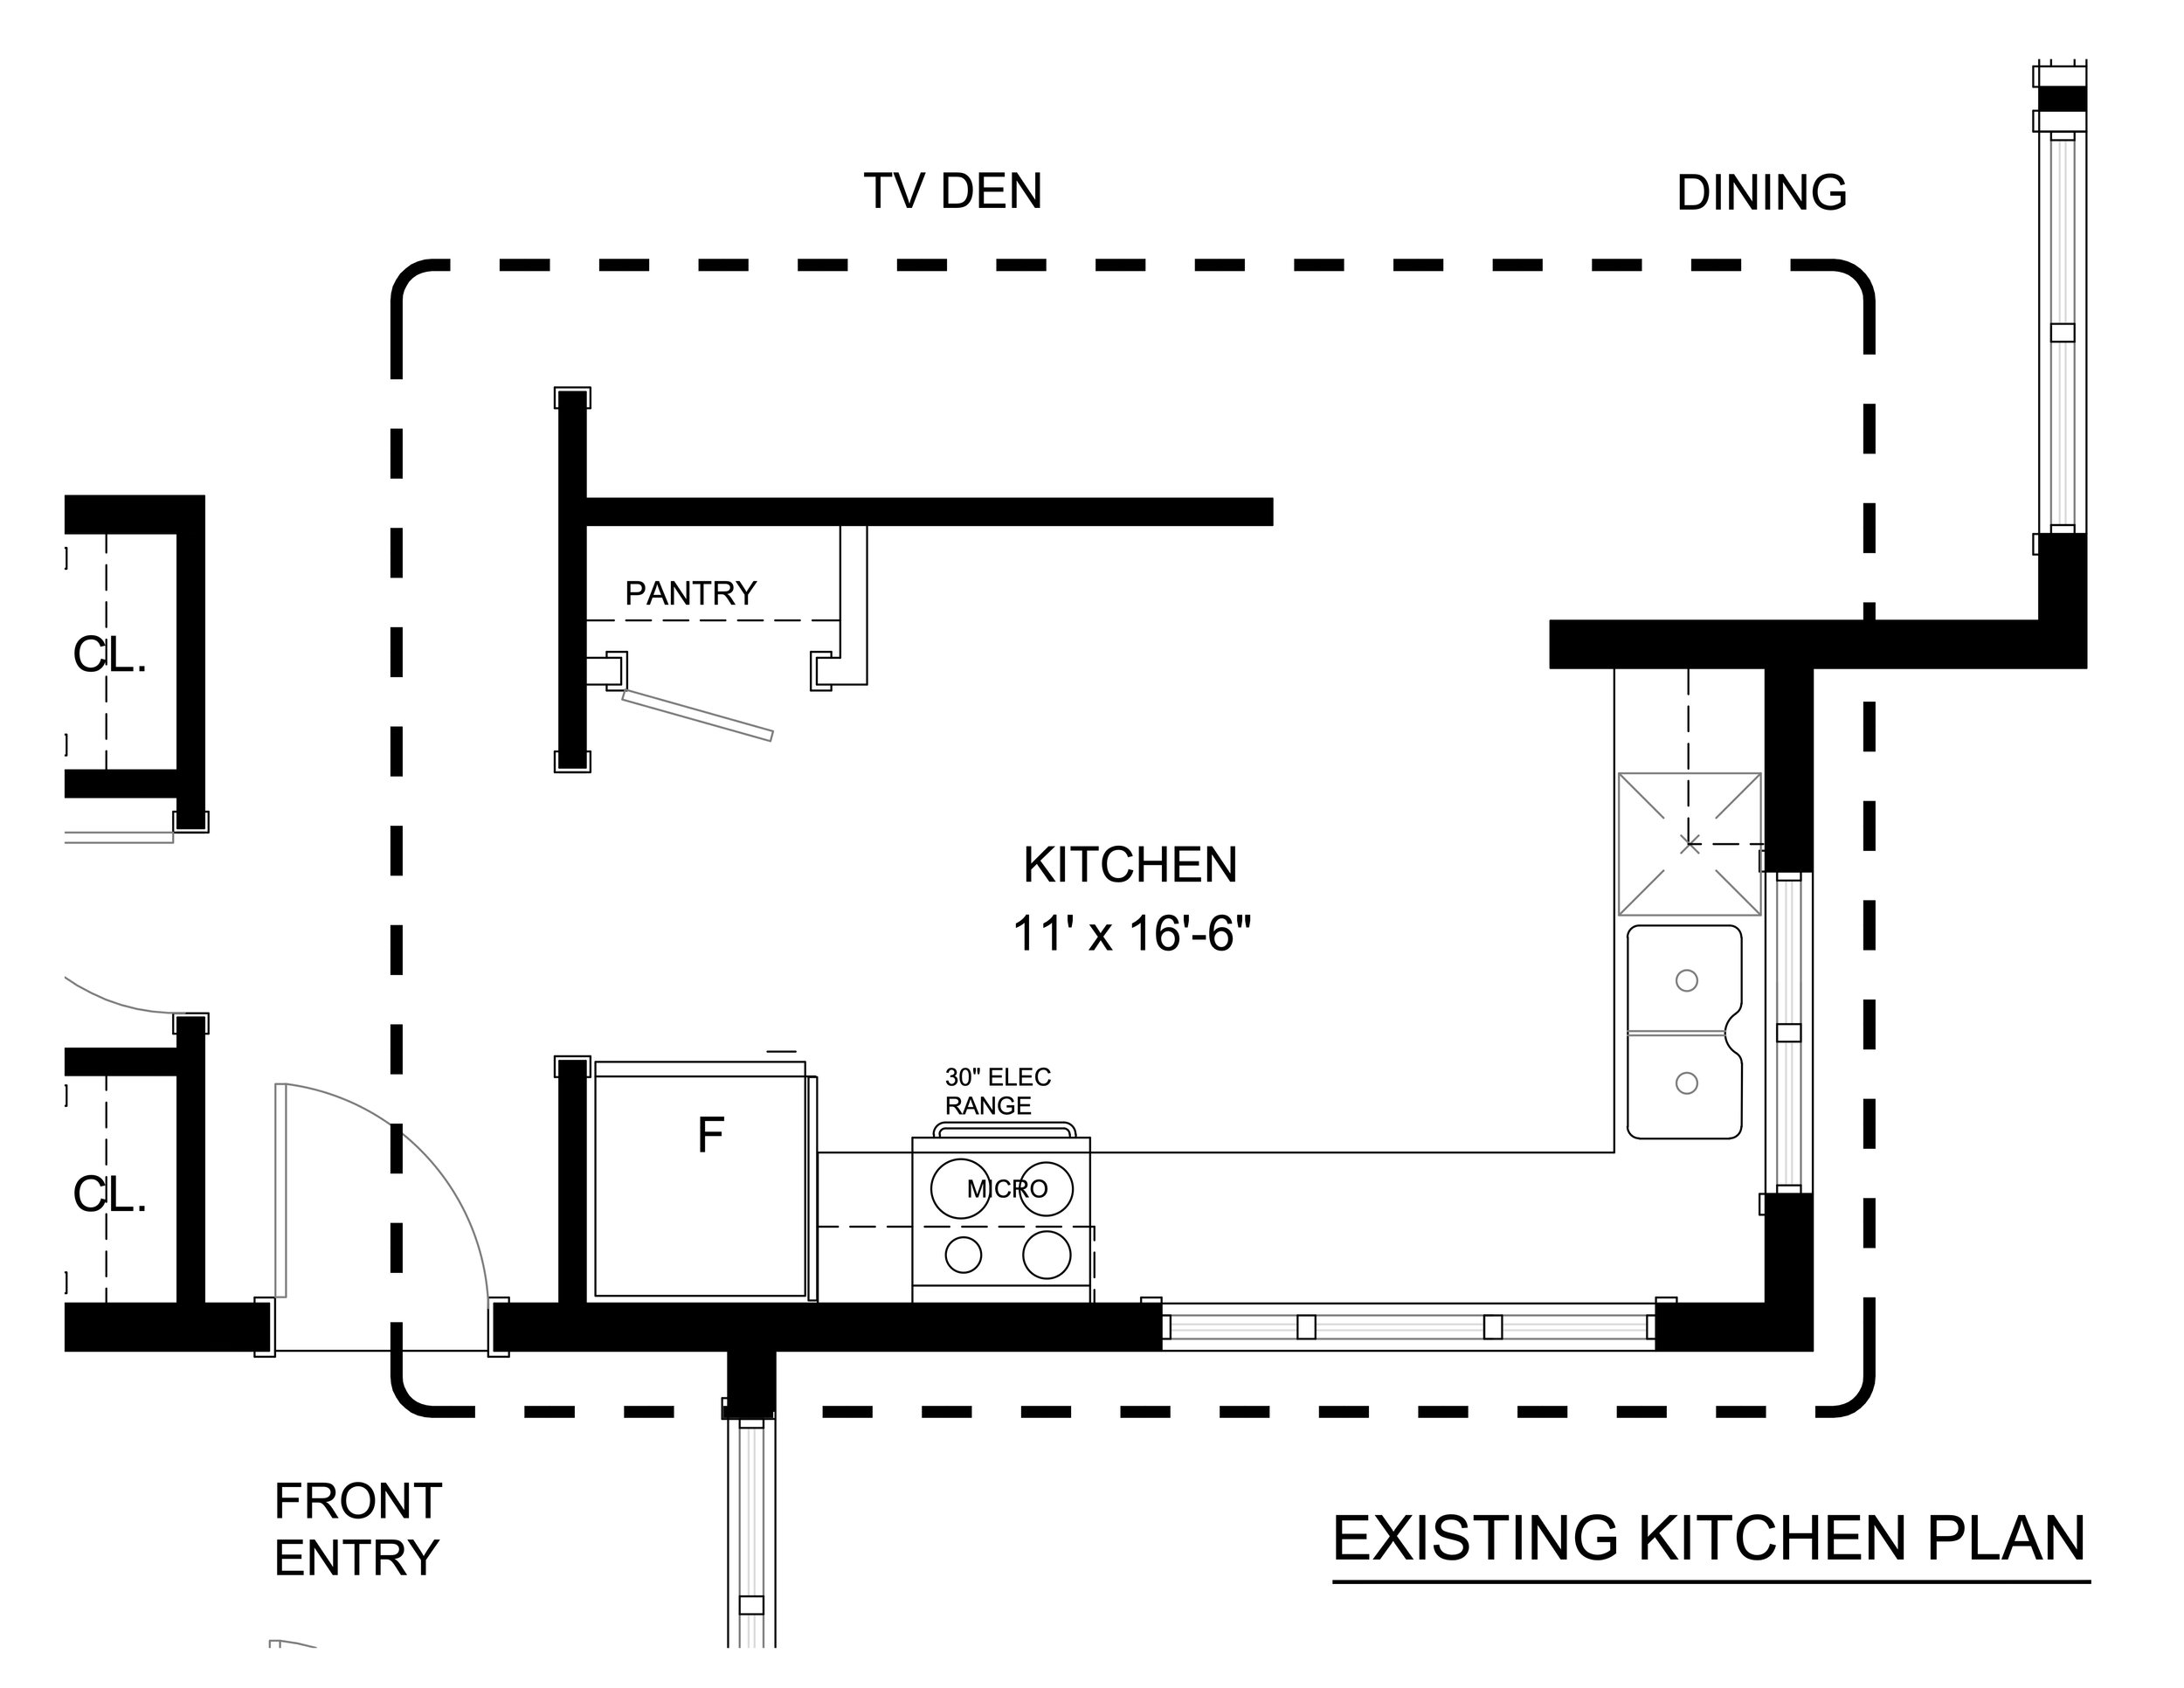
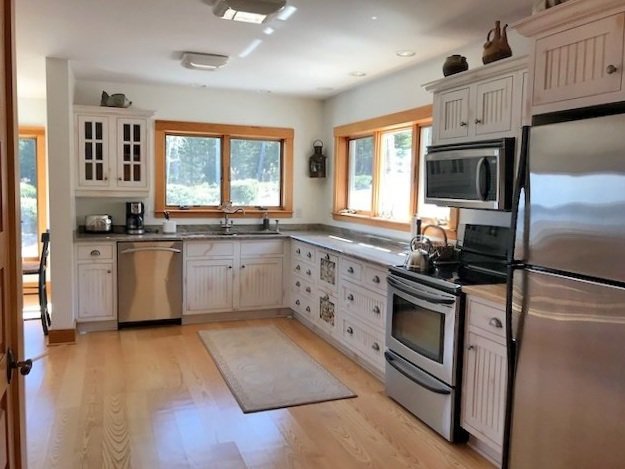
Here’s a look at what the kitchen looked like before and in plan view.

The existing layout was efficient for the most part with loads of counter space but it was lacking in storage mainly because there wasn’t a lot of wall space. Opposite the L-shaped cabinetry was a pantry closet and a blank wall that wasn’t being utilized aside from a small mobile kitchen cart. Being in a rural location, food storage is a top requirement when trips to the market or grocer are much less frequent and less convenient. Opening up this wall to the TV Den and Dining Area on the other side wasn’t on the wish list but this was considered for potential future appeal. Removing all or part of the partition wall could have given them a kitchen island or peninsula but at the same time, it would reduce kitchen storage and eliminate a wall of floor to ceiling shelving in the den. It made more sense for their lifestyle and the layout of the adjoining rooms to keep the wall. We would however remove the awkward closet and replace it with wall to wall cabinetry including a countertop area and double wall ovens.

Kitchen - Proposed Floor Plan

LAYOUT

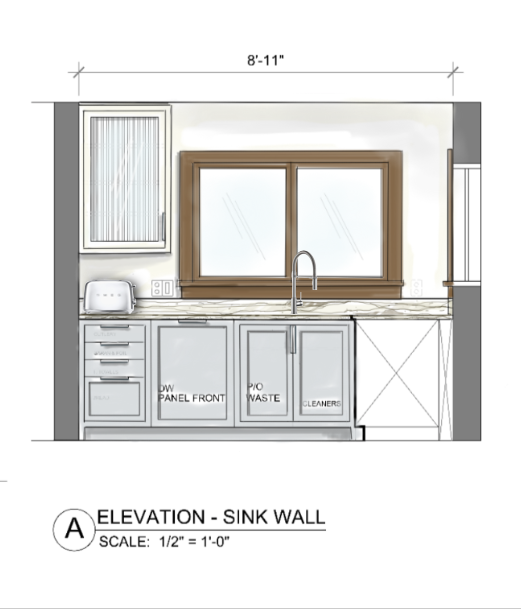
The new layout features extra deep counters, wall cabinets to the ceiling and base cabinets with full extension drawers for effortless access, along with; pull-out recycling cabinet, a dedicated area for pantry goods and beverage station, concealed storage for countertop appliances, stacked double wall ovens, an induction cooktop a counter depth fridge and a hood canopy with built in exhaust. Alternately a second oven and/or the fridge could have gone on the pantry wall, allowing for a pantry tower or more counter space to the right of the cooktop. After lengthy discussion about where the ovens would go and if the fridge should move to the pantry wall, this wining layout suited their cooking style and needs best.

With the natural setting and stunning views being the main feature of the home, the palette for the new kitchen was natural and organic to be harmonious with the tones of the exterior views. A light smokey grey/blue for the base cabinets paired with quartzite stone, white walls and uppers accented with open wood shelving and reeded glass evoked the rippled water, stormy skies, rocky terrain and forest setting that envelope the home.

APPLIANCE FEATURES

The type of appliances selected add a modern aesthetic and enhanced function with features the old kitchen didn’t have such as; an oversize workstation sink with integrated accessories, pro style high arc faucet, a smooth induction cooktop for continuous uninterrupted countertop, custom hood with concealed direct vent exhaust, counter depth fridge with bottom freezer, panelled dishwasher, and a full size second oven with both microwave and convection settings.

The cabinetry, appliances and fixture selections were contemporary and unfussy, and would provided the needed change from the traditional cottagey style the existing kitchen presented. The extra long modern linear pendant is unexpected yet a super practical form of task light over the main prep area (where there are no wall cabinets for under cabinet lights) and becomes a statement feature among the otherwise very simple design elements.

Most of their daily countertop appliances are concealed behind countertop storage cabinets and extra consideration was given to the ones that were to remain exposed to ensure they were great looking as well as great performing. Make the effort to chose countertop appliances (even if it means a splurge) that are so well designed you enjoy looking at them and they enhance the overall look of the space rather than detract from it.

Here’s a peak at the install in progress. The owners opted for linear pulls on the cabinet instead of edge pulls and they added some more reeded glass doors to the pantry area, which were yet to be delivered.

The space was always bright but now the introduction of the cool blue/grey cabinets and clean neutral white balances all the warm wood and act as a beautiful compliment to the wood floors and trim which makes the space fresh and crisp - and the wood comes to life.

This kitchen redesign is a great example of how minimal renovation work doesn’t mean minimal choices or minimal impact with kitchen upgrades. Even though the room layout itself wasn’t changing (aside from the closet removal) there are still countless possibilities for new cabinetry and appliance configurations to suit varied and different personal preferences. This is the ultimate benefit in custom planning your own kitchen - not just choosing the types of storage and appliances but the size and placement of them too. The result is the ultimate kitchen space tailored to your everyday needs but also flexible for those less frequent uses too.

Stay tuned for a round-up of my reco’s and suggestions for how to add the finishing touches to this kitchen with stylish useful accessories and small appliances to make it all sing.

For more updates on this project and other progress on current client projects, follow us on Instagram and sign-up for our Subscriber’s Edition of the blog down below.