CAPE BRETON IN THE FALL
Over the past decade we’ve travelled all over Nova Scotia by car, mainly taking the coastal routes including along the North shore, the Fundy Shore, the South Shore and the Eastern Shore, from Yarmouth to Canso to Meat Cove, and many points in between. My favourite NS destination for exploring is Cape Breton Island, we’ve returned again and again at different times of the year, even in the winter (when you’re probably the only tourist on the Island). If you only go once in your life, I’d recommend the fall, if you could go once a year, I’d also chose fall. ; ). The island is in the north eastern part of Nova Scotia and has a unique heritage of Mi’kmaq, Acadian, and Gaelic cultures. Visiting the island is like stepping back in time, its quirky, uniquely charming, captivating and astoundingly beautiful.

Quintessential East Coast fall scene just outside of Mabu, Cape Breton
Driving around Cape Breton makes for an epic road trip. Its rural rolling countryside on the southern end of the island rises to majestic highlands and soaring craggy cliffs on the northern end. If you’ve ever visited the Scottish highlands, its a very similar landscape but on a smaller scale. And less sheep. ; )

Every October Cape Breton hosts a Celtic Colours International Festival that showcases the musical and living culture of Cape Breton and attracts tens of thousands of visitors from all over the world. Its one of the premier music festivals in Canada, a week-long lineup of live music events all over the island that coincides with the fall colours.

Cap Rouge look-off. Views along the Cabot Trail to Margaree Island. Beautiful even in the rain.
The Island’s famous Cabot Trail which winds through the Highlands National Park is one of the most scenic road trips in the world, pair that with the peak fall colours and local Celtic music and its just an epic Nova Scotian experience.
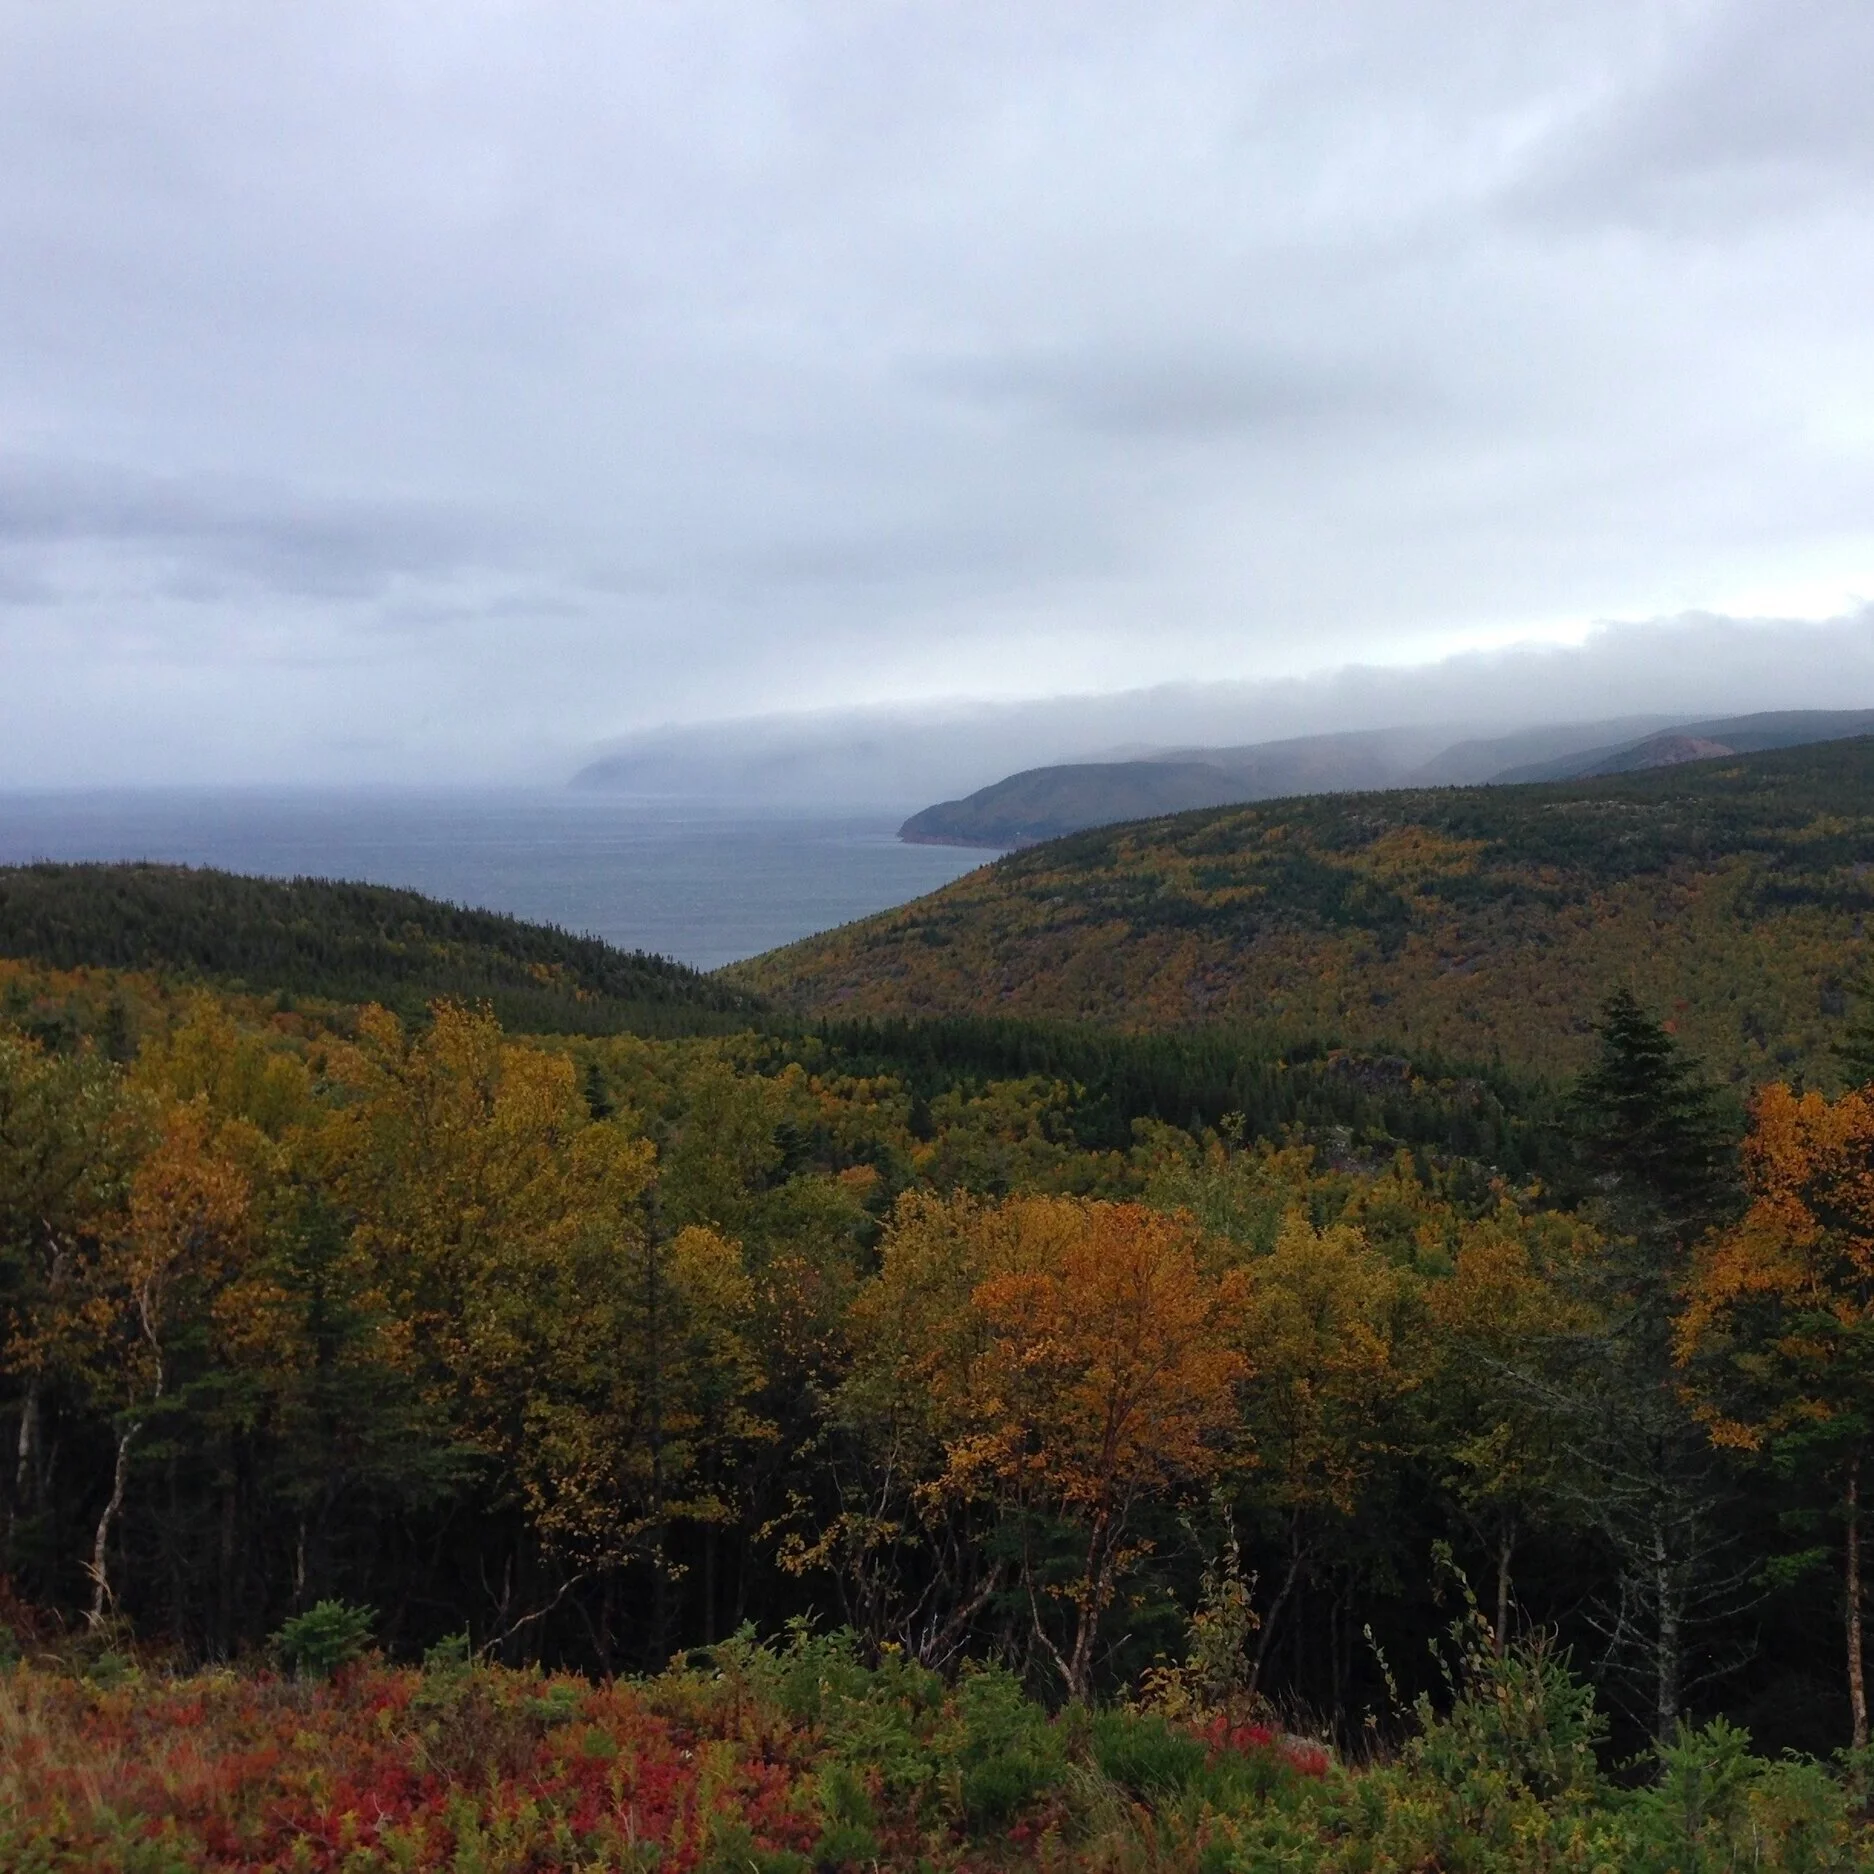
Fall Views from the McKenzie Mountain look-off on the Cabot Trail
CELTIC COLOURS FESTIVAL
The Celtic Colours Festival isn’t happening this year, instead they’re holding the festival online from October 9th to 17th. They’ll be nine nights of streaming performances you can watch at home. Check out the festival website here for all the details and a stunning gallery of Cape Breton fall photos.
This fall could still be a uniquely special year to visit Cape Breton even without the festival - for those who are in the Atlantic bubble you could enjoy the rare treat of exploring the sights without the masses - and remain safely socially distanced in your car and the vast outdoors.

Breathtaking vista’s at a look-off on the North Mountain.
If you live in Atlantic Canada and have never been to Cape Breton in the fall - consider putting it at the top of your staycation destination list. In pre-covid times you’d have to plan far ahead, accommodations during the fall are often booked up a year in advance. There aren’t a huge amount of hotels on the island but there are a growing number of AirB&Bs and private cottages for rent.

Detouring off the trail, on the way to Meat Cove..
WHERE TO STAY
For driving the trail I like to stay in the Cheticamp area as its near the entrance gates to the park and there’s so much to explore around Cheticamp plus the western side of the park has the most stunning vistas. This area is the french Acadian region of Cape Breton and many of the locals speak only french. My favourite scenic stretch to drive is from Inverness all the way to Pleasant Bay.

On the western coast of the Island Its incredibly picturesque everywhere you look, you’ll want to pull over every few minutes to take photos, my niece literally would sprint out of the car before we fully stopped. I’d be right on her heals. This was just past Margaree forks.
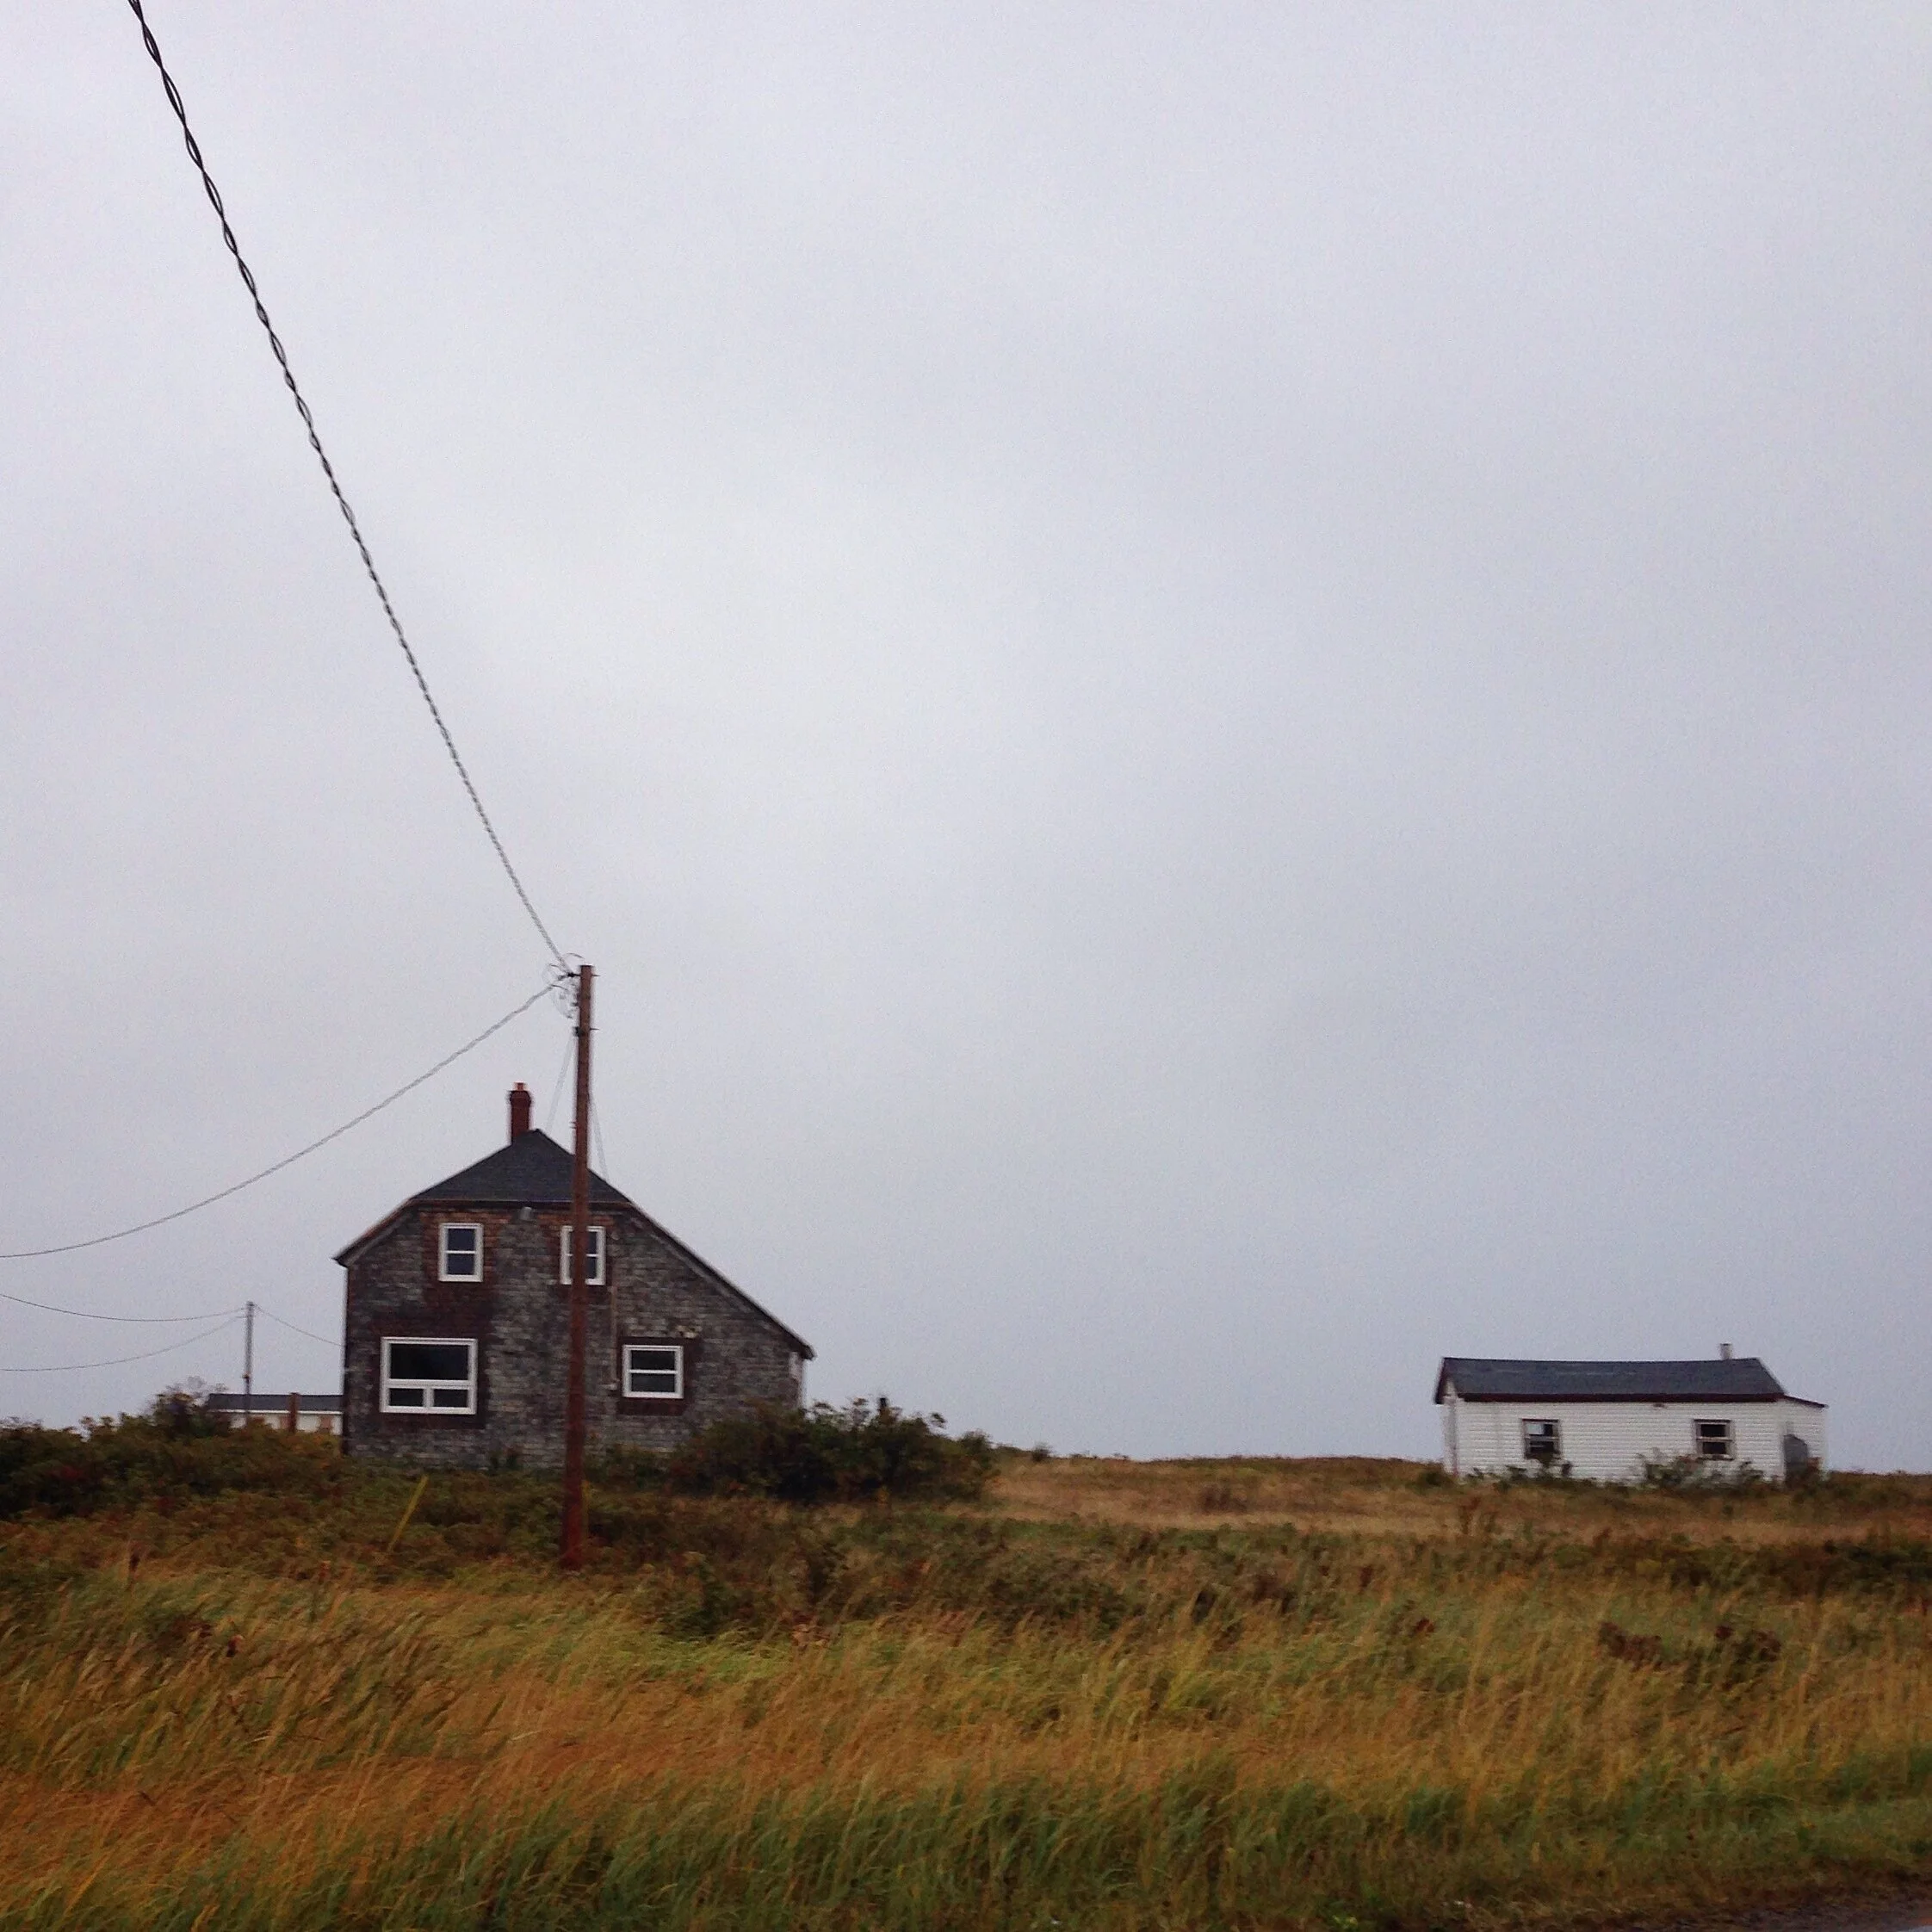
Stuck in time on Cheticamp Island.
ACCOMMODATIONS WITH A VIEW
There’s a dream home I blogged about around 10 years ago, its in Cape Breton and has been featured in Canadian House & Home and an a Benjamin Moore ad campaign, view the post here. This home and one other cottage included in that post are available for vacation rentals. If you search you’ll find others in this area with similar views. Visit the Cape Breton website for ALL the sources. I’ll do another post in the future about my favourites.
As for touring, here are some of my recommendations for ann epic Cape Breton road trip.
#1. Go in the fall! Take an extra day off around Thanksgiving, its a great couples trip, friends trip or family trip.

My niece on our most recent Cabot Trail road trip…high winds at the McKenzie Mountain look off.
#2. For driving the Cabot Trail, I recommend planning to stay in the area at least 2 full days incase one day is rainy or foggy, if visibility is low you won’t see as much. This gives you a back up day for weather and an extra day to drive the trail again and explore some sights off the trail like Meat Cove, the northern most easterly tip of the island.

Off the Cabot Trail and enroute to Meat Cove.

Seaside barn on the north eastern tip of Cape Breton near Meat Cove.
Now this is a barn with a view! A favourite scenic stop on the road to Meat Cove.

Looking off from Meat Cove campground, the beach down below.

The pebble beach at Meat Cove.
#3. If you’re travelling as a group stay at a resort, a private cottage or AirB&B - preferably with a great view as they’ll have a bit more space than the often vintage era motels with tiny rooms. Ideally after a day of driving you want someplace you can dine-in (with take-out) or within walking distance to a nearby restaurant. (Just a head-ups, you can’t have the same expectations or level of choice for Airb&b accommodations on Cape Breton as you would in more populated destinations.)

The views from the deck of our boathouse Airb&b in Cheticamp.
On our last visit we stayed in a boathouse that was right in Cheticamp with stunning 180 degree water views (you can whale watch from the deck) and directly across from Cheticamp Island with rolling green hills and grazing cows.
#4. Take an SUV, if you don’t already have an SUV consider renting one especially if you’ll have more than 2 people in the vehicle, or at least take a 4 door car. An SUV will have larger windows and higher, more comfortable seating, multiple USB ports (for charging phone cams) and cup holders are also a bonus. You’ll be hopping in and out of the car a LOT, sometimes every minute or two. You’ll want room for extra coats (the weather changes by the minute) a cooler, picnic blanker, hiking poles, room for shopping bags (!) etc. Book a rental well in advance its the busiest time of the year for car rentals in NS.

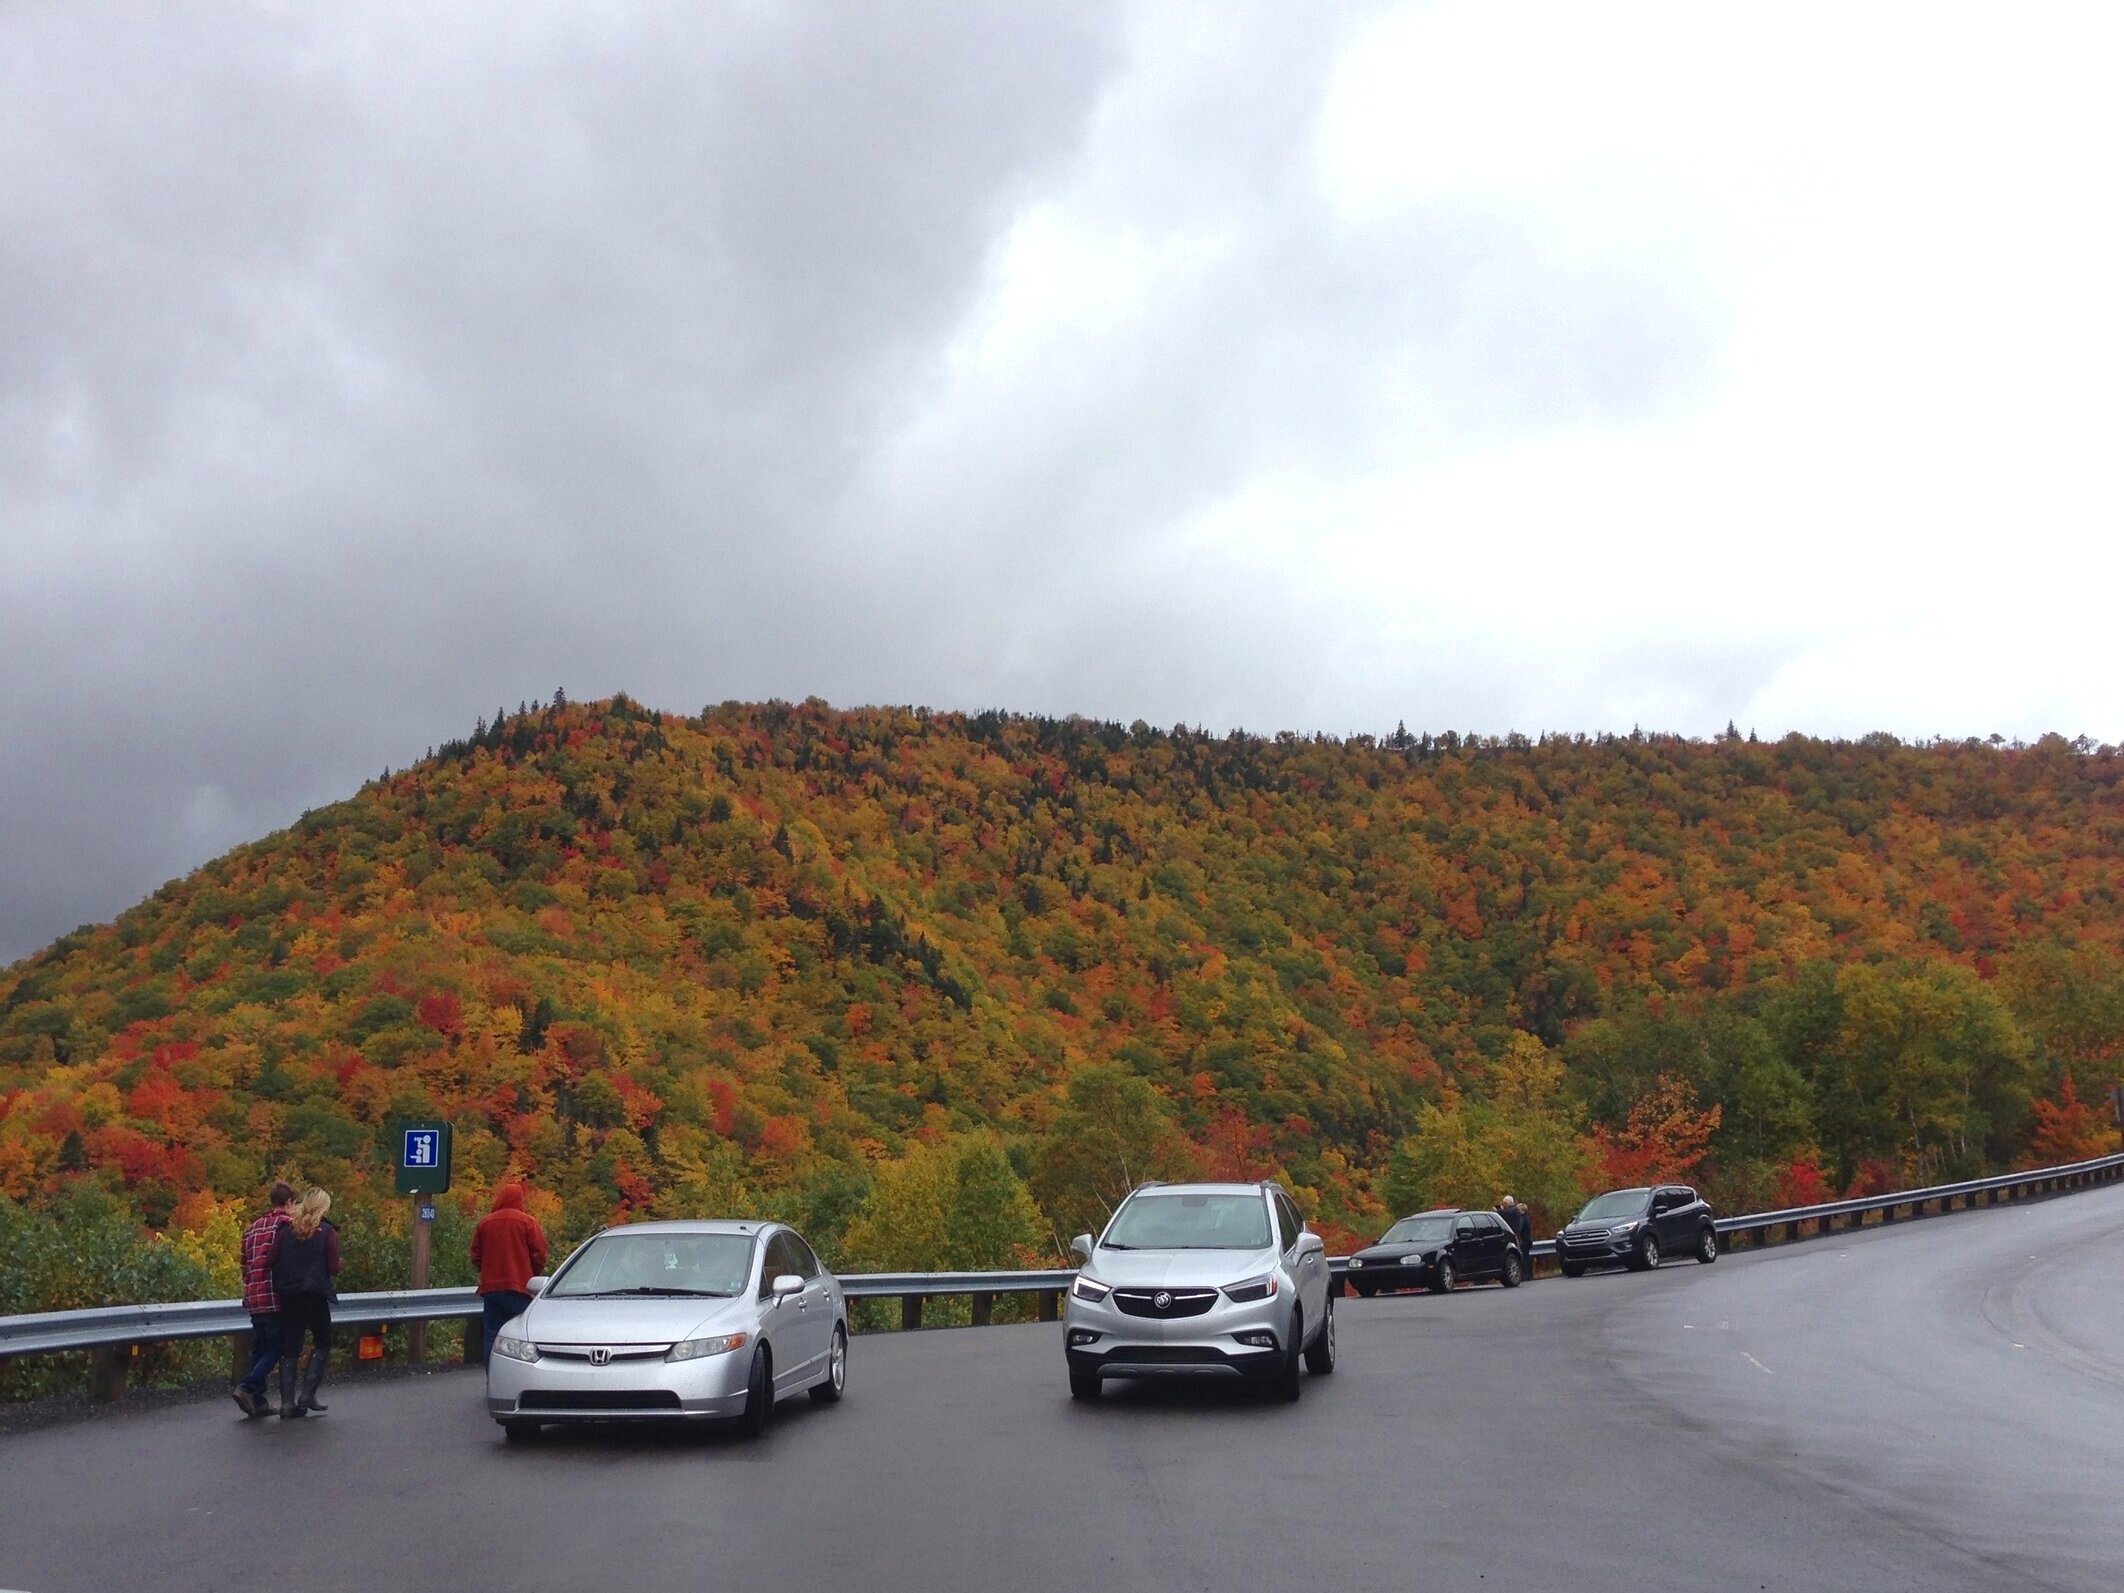
Occasionally there’s a small parking area off the road with picnic area, but mainly throughout the trail there’s designated look-off spots where you pull-over on the side of the road. You’ll be hopping in and out of the car all day!
At the North Mountain Look-off
#5. Plan a hike or two. There are so many scenic hiking trails in the highlands just off the Cabot trail of all different lengths and difficulty. They’ll take you to some jaw-dropping views not visible from the road, like the Franey Trail, the Kauzmann Trail and Skyline Trail. Check them out (search on Instagram too!) and plan your timing and pack appropriate gear. (There’s no need to pack anything dressy, none whatsoever. Casual street wear or active wear is the norm everywhere).

Waterfall on a small hike off the Cabot Trail
The Skyline trail was closed on our last trip but we did an impromptu short hike on a trail we came across that was about 45min in and out, it had a few suspension bridges over a creek and a waterfall at the end. Sorry, can’t remember the name of this trail. It was a refreshing break from sitting in the car and was so picturesque.
#6. Start Fresh! For maximum enjoyment, plan to drive the Cabot Trail the day after you arrive and not the same day you depart, because chances are you’ll have to drive at least a few hours to get to and from. (Cape Breton is a 3.5 hour drive from Halifax airport and the Cabot Trail is about 45 minutes from the airport in Sydney, CB.). Get up in the morning fresh and ready for a full day of adventure and sightseeing and then park the car and relax for an evening of local food and music.

Our boathouse accommodations in Cheticamp, viewed from the restaurant next door.
The view of our boathouse accommodations in Cheticamp from the restaurant next door, about 20 steps along the boardwalk. It was super convenient and after 8 or 10 hours in the car exploring this was about as far as we wanted to go for dinner! Perfect.
#7. Stop at the Visitor information centre just as you enter CB after crossing the causeway. Pick up a map (don’t rely on cell service or wifi, cell service is almost non existent on the trail and most parts of the island) and brochures and notices about local attractions, events and restaurants.
#8. Drive the Cabot Trail in both directions because the views and sight lines will be different depending on which way you’re travelling. I’ve driven it multiple times both directions. My favourite direction is clockwise starting from Cheticamp. I think the vistas are much more dramatic on approach travelling in that direction and my travel partners always agree too.

If Driving counter-clockwise this guardrail in this image would be on the left side of the road.
The above photo was taken of the view behind the car as we were driving the trail clockwise, while we were pulled over to the right side of the road The road winds through the mountains so sometimes the guardrail and drop-off is on the left of the road and sometimes its on the right. Below is the same location, the camera is facing in the direction we were driving, clockwise.

Driving the trail clockwise, the guardrail and drop-off is on the right hand side of the road in this spot.
So if you read that people recommend you drive it counter-clockwise because the views are on the right, its not really relevant in my opinion - the views are equally to the left and right side of the road, it changes as the road winds.. But drama is all about the approach - so I think the best viewing experience is clockwise because the vistas unfold in front of you more dramatically than from the counter-clockwise direction - from my experience. ; ) (the feature photo of this post’s title shows my Niece capturing the view just further along around this bend, also taken on the right side of the road, driving clockwise).
The BEST part about being based in Cheticamp and driving the trail clockwise - the main park entrance is a short drive away, and only 20 minutes to the Skyline trail, (super convenient if you want to do that the second day). At the end of the day if you return to Cheticamp in the counter-clockwise direction you can witness the most epic Cabot Trail scene of all - Cap Rouge at sunset! What a way to cap off the day, just minutes away from arriving back to your accommodations.
#9. Don’t let rain deter you. I’ve driven the trail on sunny days, rainy days, misty days, and dark and stormy days. Unless there’s heavy mist and fog then visibility will be low but even then, there’s lot of artisan shops and exploring you can do. And true to maritime weather, it can change on a dime so you might get all conditions in one day. On my last trip, we didn’t’ see the sun the entire 4 days, not once, but the scenery never disappointed.

Stop in at Tartans and Treasures in Dingwall and look up your family tartan.
A fun gift shop on the trail is Tartans and Treasures. If you’re of Irish or Scottish heritage they’ll look up your family tartan, they carry wool scarves (made in Scotland) and many other tartan products for every clan. If you don’t have a family tartan just find a tartan for a friend or just chose one you like for yourself, like me, I chose the Blackwatch and Holyrood scarves. My niece is Scottish on her mother’s side and discovered the Stewart clan tartan is associated to their name which she now wears (the classic tartan we associate with Christmas!).
If you collect souvenirs like t-shirts or ball caps from your travels, stop at the Visitor Information centre again at the causeway on your way off the island. There’s a large gift shop next to the information centre with a great selection. (Just in case you got sidetracked during your adventures, or forgot someone on your gift list). There are lots of artisan studios and gift shops to visit along the trail with local crafts; folk art, pottery, rug hooking, glass art etc. St. Anne’s has quite a few in one place.
#10. Research before you go. Ideally I think a 3 night, 4 day trip is the perfect length of time to experience the Cape Breton scenery, food, music and arts. And its an ideal destination for singles, couples or groups, whether your budget is tent camping or luxury resort. Whatever your interests are; photography (endless scenery!), music, golfing, pottery, rug hooking, folk art, cuisine, hiking, heritage culture, fishing, whale watching….. there is something for everyone of all ages and abilities within close proximity of the Cabot Trail, a group can easily break off and do separate activities.
Picturesque scenery enroute to Meat Cove.
The Celtic Colours Festivals event isn’t happening in 2020 but there’s still plenty to experience if you have the opportunity to visit this fall or post-covid at another time of the year.
If you go, I promise you’ll be lost for words and soon get sick of hearing yourself say “wow”, “wow”, over and over again. The sheer magnitude of the colours in the highlands literally will have you gasping.

For more advice and round-ups of Carol’s favourite finds and products - subscribe to our News letter in the sidebar! When you sign-up you’ll receive the next edition of CREED For Your Home in your inbox and a link to the current edition.
For more peeks at our design projects and inspiration you can follow us on Instagram and Pinterest @carolreeddesign